Comment Faire des Squats : Guide de Forme, Muscles & Variantes
Why Bodyweight Squats Are the Foundation of Leg Training
The bodyweight squat — sometimes called an air squat — is the most fundamental lower-body exercise you can do. No barbell, no rack, no gym membership required. Just you, gravity, and the willingness to sit down and stand back up with control.
Squats are not just a leg exercise. A 2020 study in the Journal of Sports Science & Medicine found that properly executed bodyweight squats activate the gluteus maximus at over 70% of maximum voluntary contraction — enough to build meaningful strength even without added weight. That makes the bodyweight squat one of the most efficient exercises per minute of training time.
Muscles Worked
The squat is a compound movement that recruits nearly every muscle below your waist:
- Primary movers: Quadriceps (front of thighs — drive the upward phase), gluteus maximus (extends the hips out of the bottom), hamstrings (assist hip extension and control the descent)
- Stabilizers: Erector spinae (maintains upright torso), transverse abdominis (core bracing), gastrocnemius and soleus (ankle stability)
- Secondary: Hip adductors (inner thighs keep knees from collapsing inward), abductors (control pelvic alignment in single-leg variations)
Deeper squats shift more work toward the glutes and hamstrings. Shallow squats keep the emphasis on the quads. Both are valid — choose your depth based on your mobility and training goals.
Squat: Step-by-Step Form
A good squat looks simple but has several critical details. Here is the exact sequence:
Step 1 — Stance: Stand with feet shoulder-width apart or slightly wider. Turn your toes out about 15–30 degrees — this opens up your hip joints for a deeper squat. Your exact toe angle depends on your hip anatomy, so experiment to find what feels most natural.
Step 2 — Brace: Before you move, take a breath and brace your core as if preparing for impact. Squeeze your glutes lightly. Pull your shoulder blades down and together — this keeps your chest up throughout the movement.
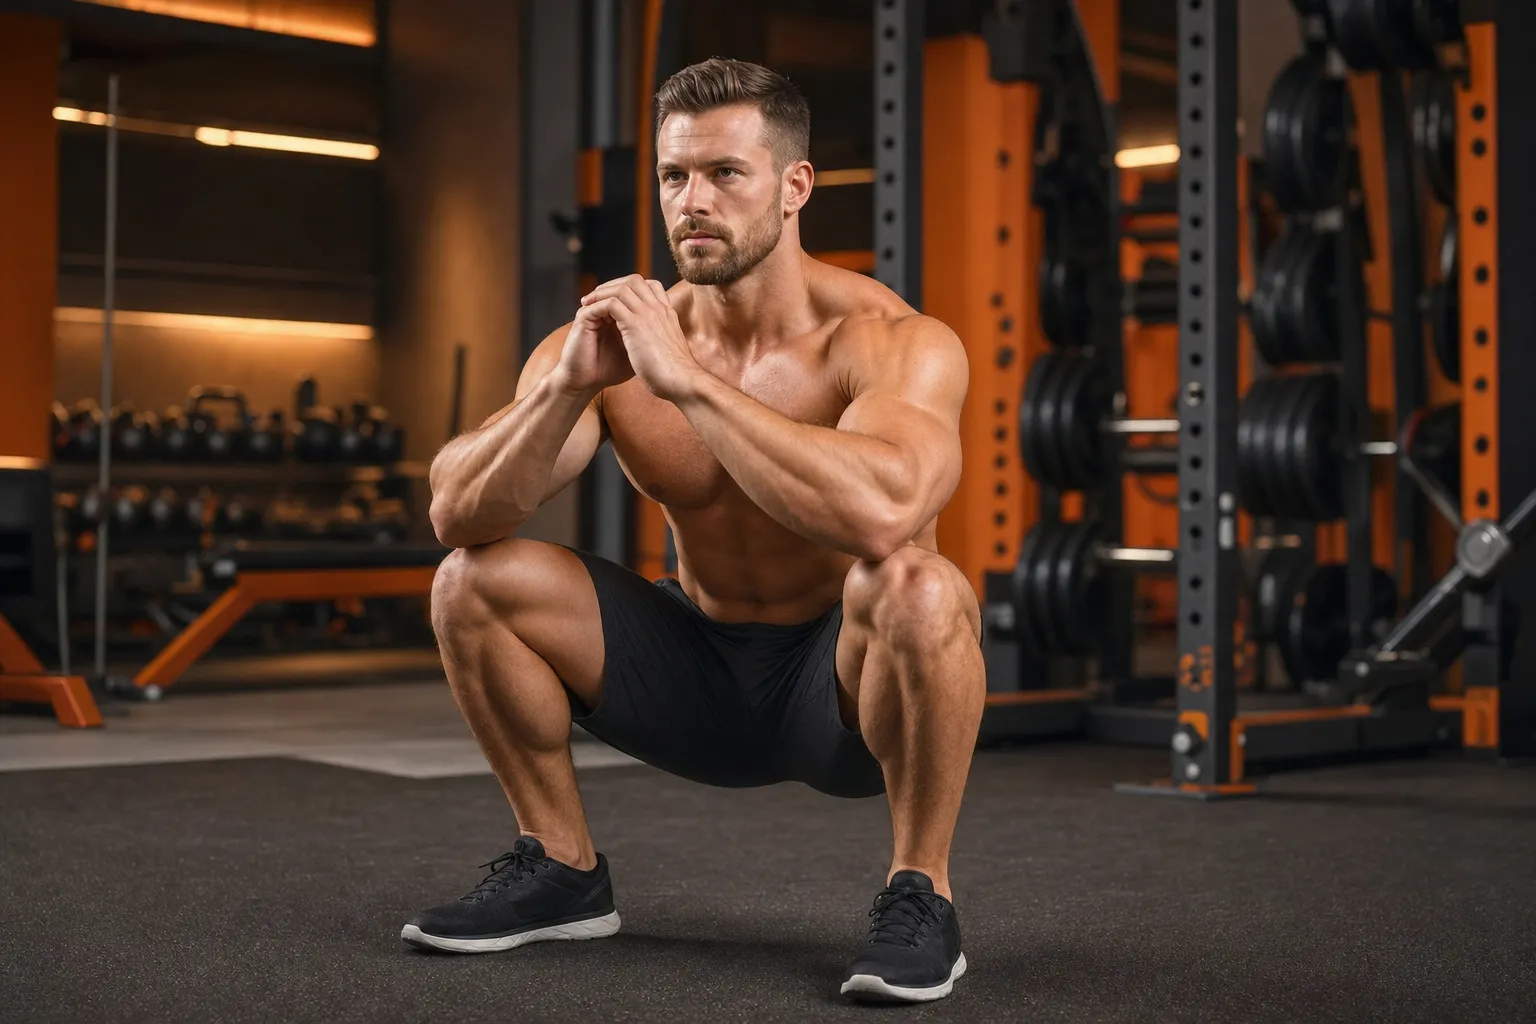
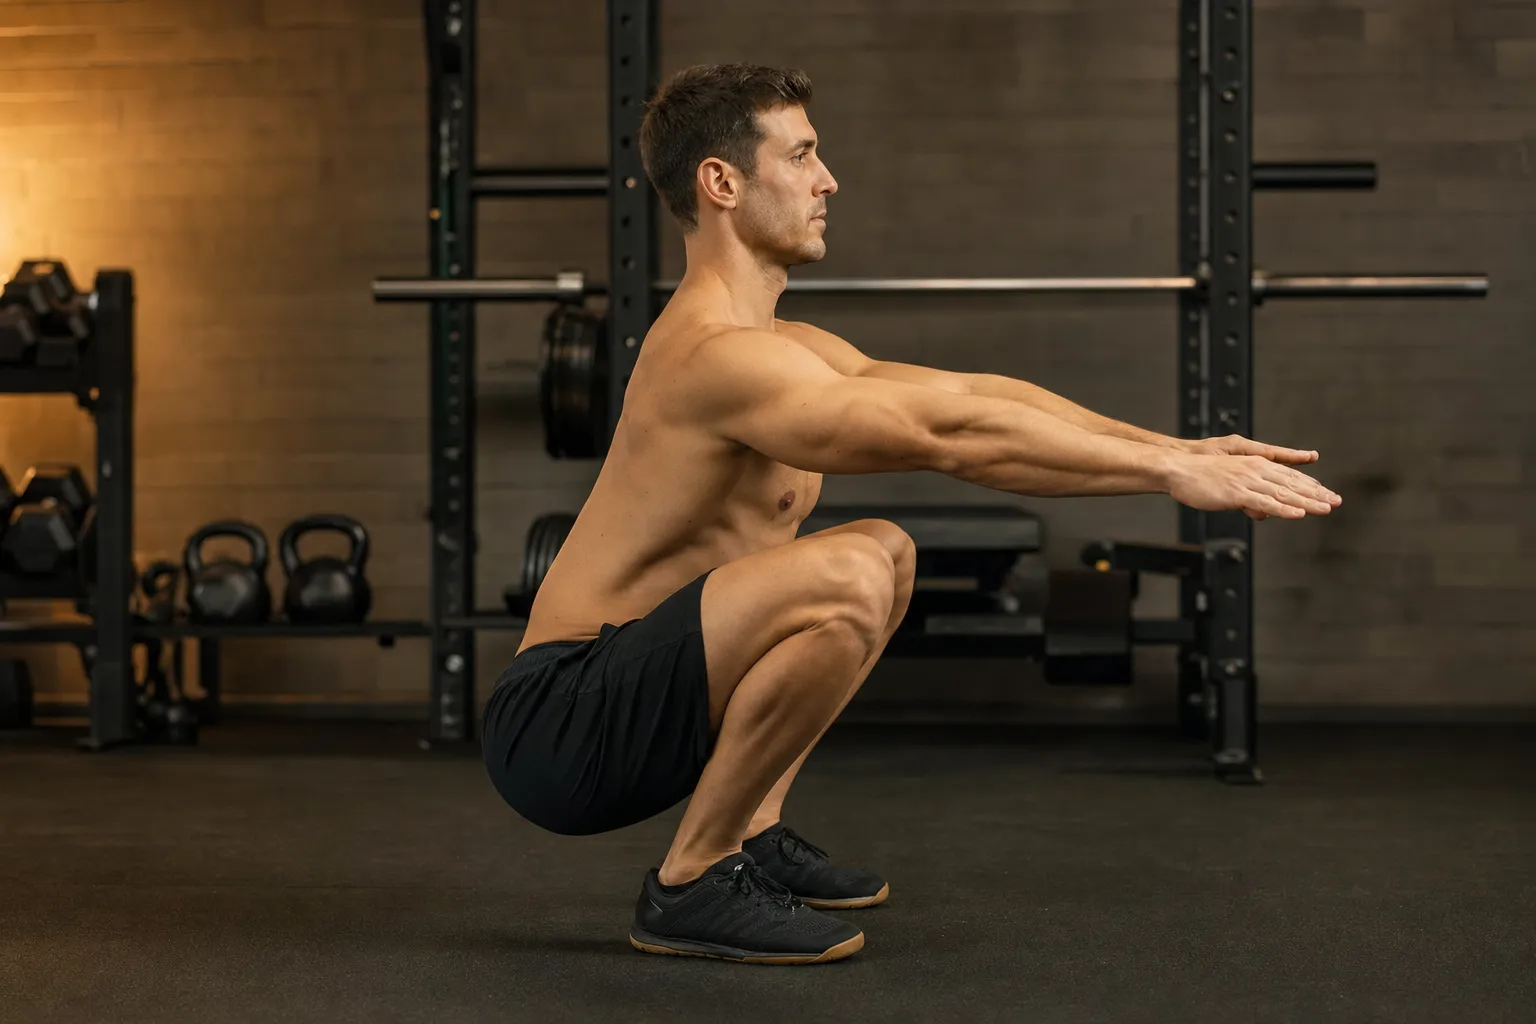
Step 3 — Descend: Push your hips back and bend your knees simultaneously. Think about sitting into a chair that is slightly behind you. Keep your chest proud and your weight distributed evenly across your whole foot — not just your heels, not just your toes. Descend until your thighs are at least parallel to the floor, or deeper if your mobility allows.
Step 4 — Stand: Drive through your midfoot to stand back up. Squeeze your glutes at the top to fully extend your hips. Exhale as you rise. Your torso angle should remain consistent throughout — if you start folding forward at the bottom, your core needs more bracing or the depth is too much for your current mobility.
The American Council on Exercise (ACE) recommends a controlled tempo of about 2 seconds down and 1–2 seconds up. Pausing for a beat at the bottom eliminates momentum and forces your muscles to do the work rather than bouncing out of the hole.
Squat Variations for Every Level
Bodyweight squats are endlessly adaptable. If the standard version is too hard or too easy, there is a variation that fits you right now.
| Variation | Difficulty | Main Focus | Who It's For |
|---|---|---|---|
| Wall squat (hold) | Beginner | Quads + endurance | First-timers, knee rehab |
| Box squat | Beginner | Sitting pattern | Learning depth control |
| Standard squat | Intermediate | Quads + glutes + hamstrings | Baseline for everyone |
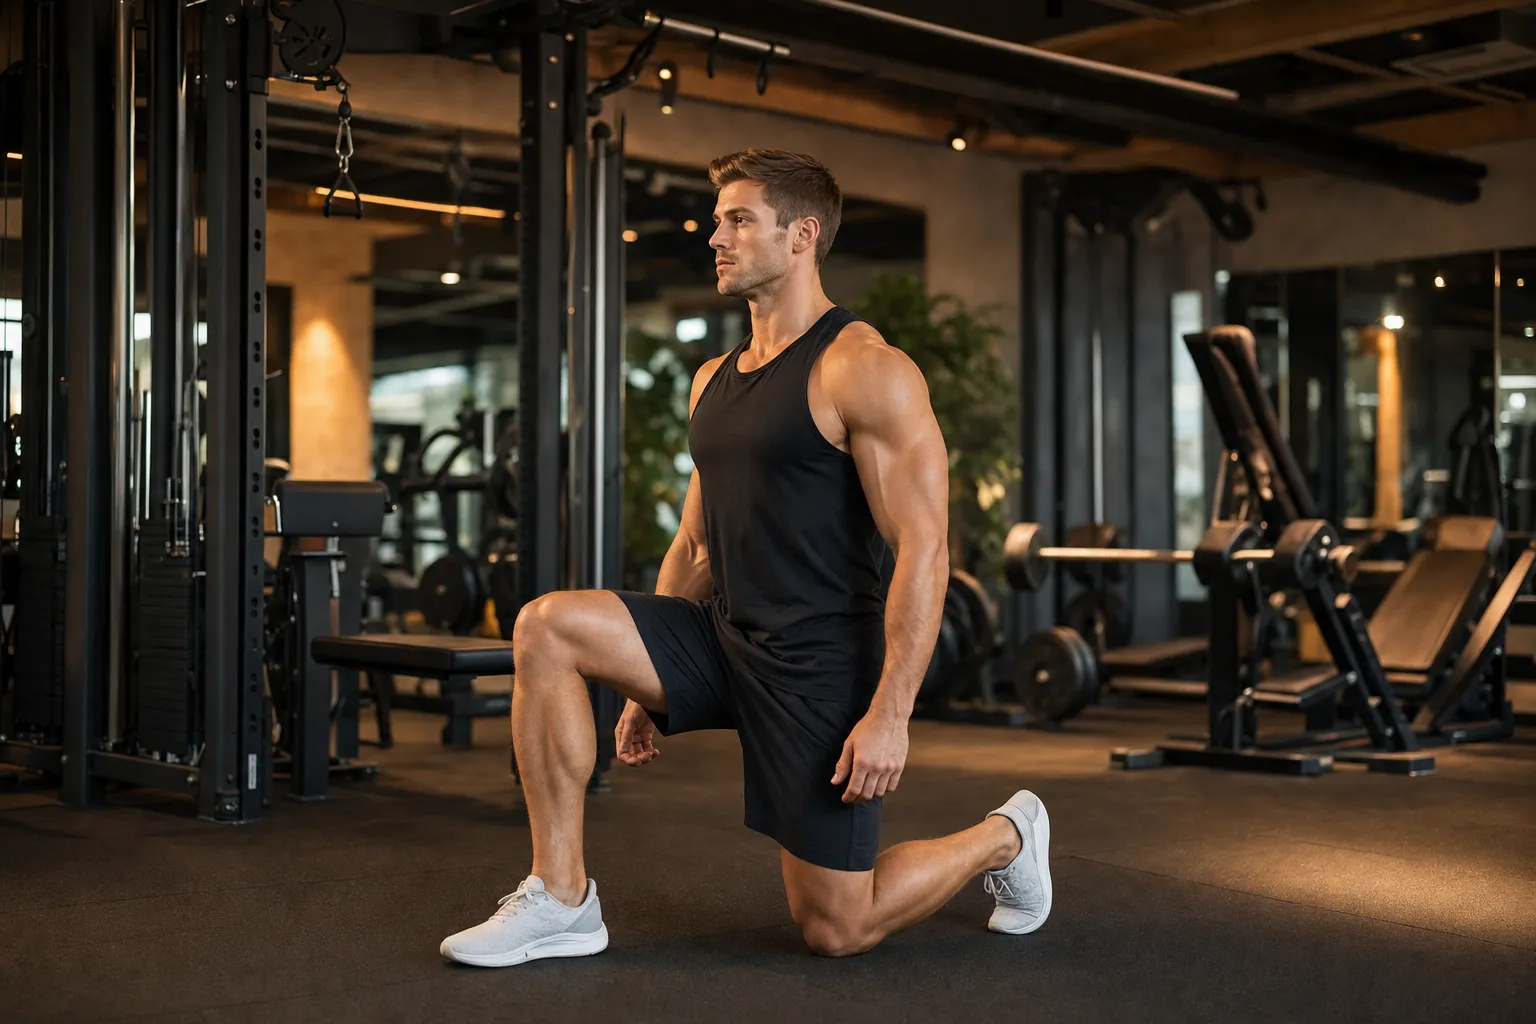
| Split squat | Intermediate | Single-leg strength | Fixing left-right imbalances |
| Jump squat | Advanced | Explosive power | Athletes, plyometric training |
Progression strategy: Master the standard bodyweight squat for 3 sets of 15 reps with clean form before moving to split squats. In my experience, most people rush into jump squats before they have the landing mechanics to do them safely — a jump squat with collapsed knees is a fast track to an ACL injury. Earn the right to jump by mastering the basic squat first.
The split squat deserves special attention: it exposes and corrects strength imbalances between your left and right legs that bilateral squats can hide. If one side feels dramatically harder, that is the side that needs more work.
Common Squat Mistakes
Squats feel natural, which makes it easy to overlook form errors that build up over months and eventually cause pain. Here are the five mistakes I correct most often:
1. Knees caving inward: When your knees collapse toward each other at the bottom (valgus collapse), it stresses the ACL and meniscus. Fix: Actively push your knees outward over your pinky toes. If this feels impossible, your glute medius may be weak — banded lateral walks can help.
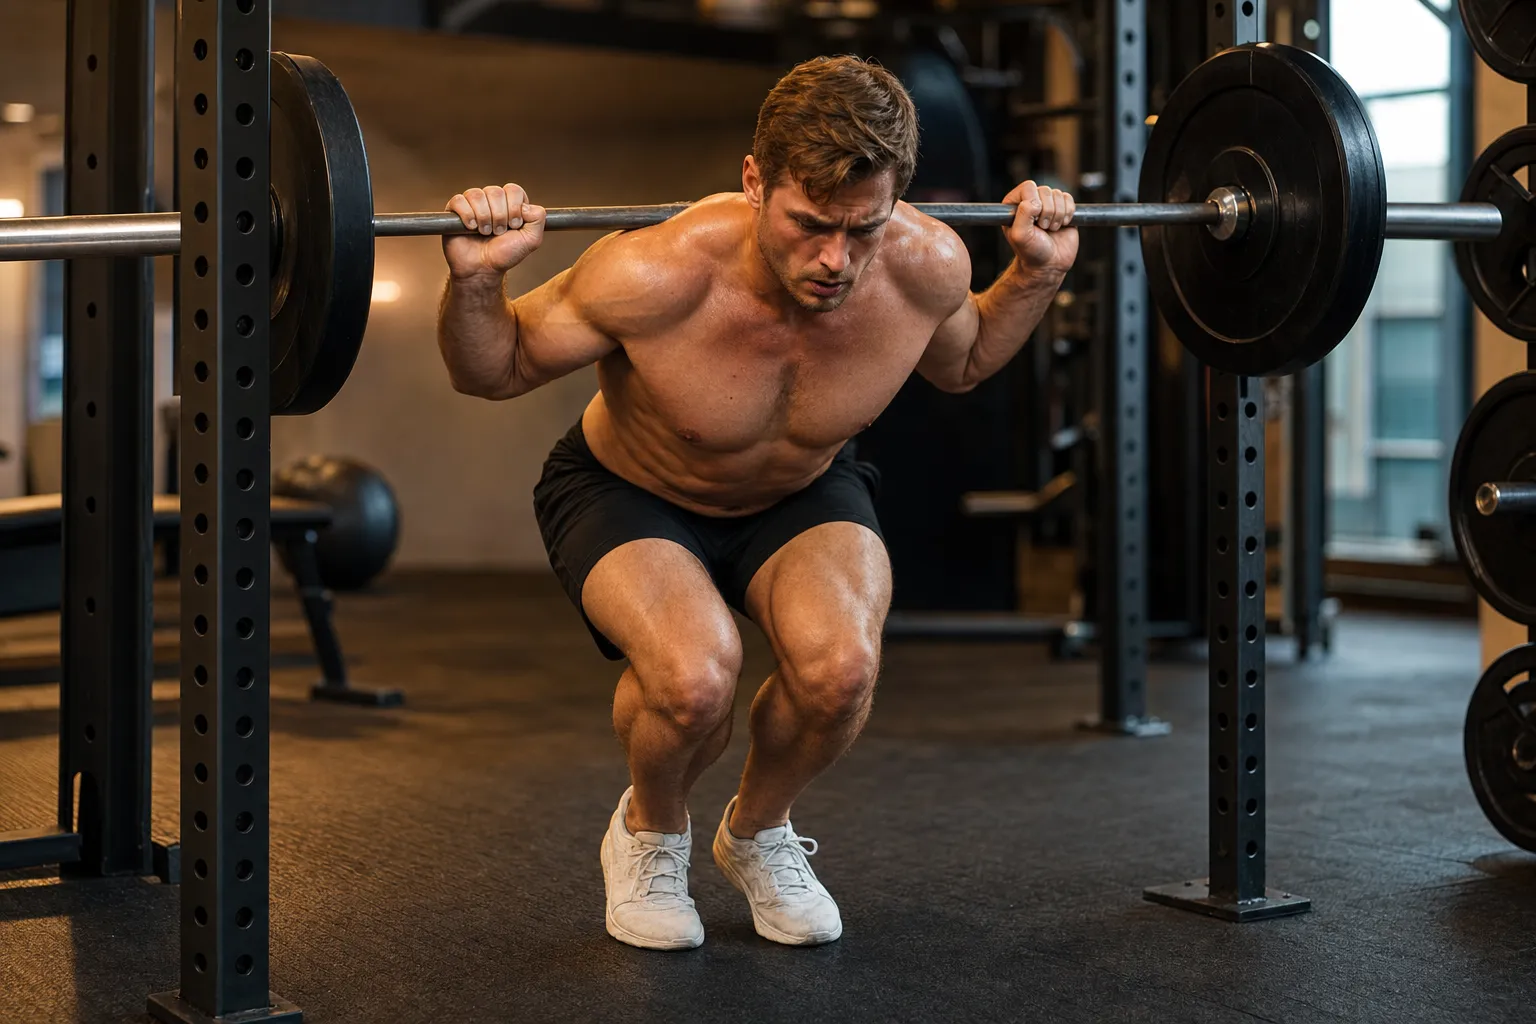
2. Excessive forward lean: Your torso folding forward like a good morning shifts the load from your legs to your lower back. Fix: Brace harder, lift your chest, and think about sliding your back down a wall. If your ankle mobility is the bottleneck, elevate your heels slightly on a small plate or wedge.
3. Weight shifting to toes: Rising onto your toes during the descent shifts stress to the knees and removes glute engagement. Fix: Keep your weight centered over your midfoot. Curl your toes up inside your shoes at the bottom of the squat — if you cannot, your weight is too far forward.
4. Not reaching depth: Stopping well above parallel shortens the range of motion and leaves the glutes largely untrained. Fix: Use a box or bench as a depth target — sit back until your glutes tap it, then stand up. Over time, lower the target until you reach parallel.
5. Bouncing at the bottom: Using the stretch reflex to rebound out of the hole masks weakness and reduces muscle tension. Fix: Pause for a full second at the bottom of every rep. This builds true strength through the entire range of motion.
Key Takeaways
| Point | Recommendation |
|---|---|
| Primary muscles | Quads, glutes, hamstrings — core and calves stabilize |
| Stance | Feet shoulder-width, toes out 15–30 degrees |
| Depth | At least parallel — deeper if mobility allows |
| Weight distribution | Midfoot — not heels-only, not on toes |
| Progression | Wall → Box → Standard → Split → Jump |
Quick checklist — fix these before your next set:
- Core braced and chest up before every rep
- Knees tracking over toes — no inward collapse
- Weight centered on midfoot throughout
- Reaching at least parallel depth
- No bounce at the bottom — pause for control
Next steps: If standard squats feel shaky, start with 3 sets of 10 box squats (sit onto a chair, then stand) three times per week. Once you can do 15 clean reps, remove the box and progress to full depth. For balanced leg development, pair squats with barbell leg exercises once you are ready for weighted training.
Questions Fréquentes
Quels muscles travaillent les squats ?
Principalement quadriceps, fessiers et ischio-jambiers. Mollets, sangle abdominale et bas du dos stabilisent. Squats profonds = plus de fessiers.
Les squats sont-ils mauvais pour les genoux ?
Non, avec bonne technique. Genoux alignés avec les orteils. En cas de douleur, commencez par les squats au mur.
Combien de squats par jour ?
Pas de nombre magique. Pour la force : 3-4 séries de 10-15 répétitions, 3 fois par semaine. Qualité avant quantité.