Core Resistance Band Workout: Anti-Rotation Press and Pallof Press
Why Resistance Bands Are the Best Tool for Core Stability
Most core exercises train the abs to produce movement — crunches flex the spine, twists rotate it. But the primary job of your core in daily life and sports is to resist movement. Picking up a heavy bag on one side, absorbing a push, landing from a jump — your core must prevent your spine from bending, twisting, or collapsing under load. This is called anti-movement training, and it is the foundation of functional core strength.
Resistance bands are uniquely suited for anti-rotation training. When you anchor a band to your side and press it out in front of you, the band constantly pulls you back toward the anchor point. Your core must fire continuously to resist that rotation — there is no rest at the top, no momentum to cheat with. A 2019 study in the Journal of Bodywork and Movement Therapies found that anti-rotation exercises produced significantly greater activation of the transverse abdominis and obliques compared to traditional crunch-based exercises.
The other advantage is accessibility. Resistance bands weigh almost nothing, cost a fraction of gym equipment, and can be anchored to any door, pole, or sturdy object. You can train your entire anti-rotation core system in a hotel room, at home, or between appointments. No gym required.
This guide covers the two foundational anti-rotation band exercises: the banded anti-rotation press and the Pallof press. Both train your core to resist rotation — not produce it.
How to Do the Banded Anti-Rotation Press with Proper Form
The banded anti-rotation press is the most direct anti-rotation exercise. A band anchored to your side pulls you sideways — your core must resist that pull throughout the entire movement. It targets the transverse abdominis, internal and external obliques, and the multifidus along your spine.
Step 1 — Band Setup and Stance
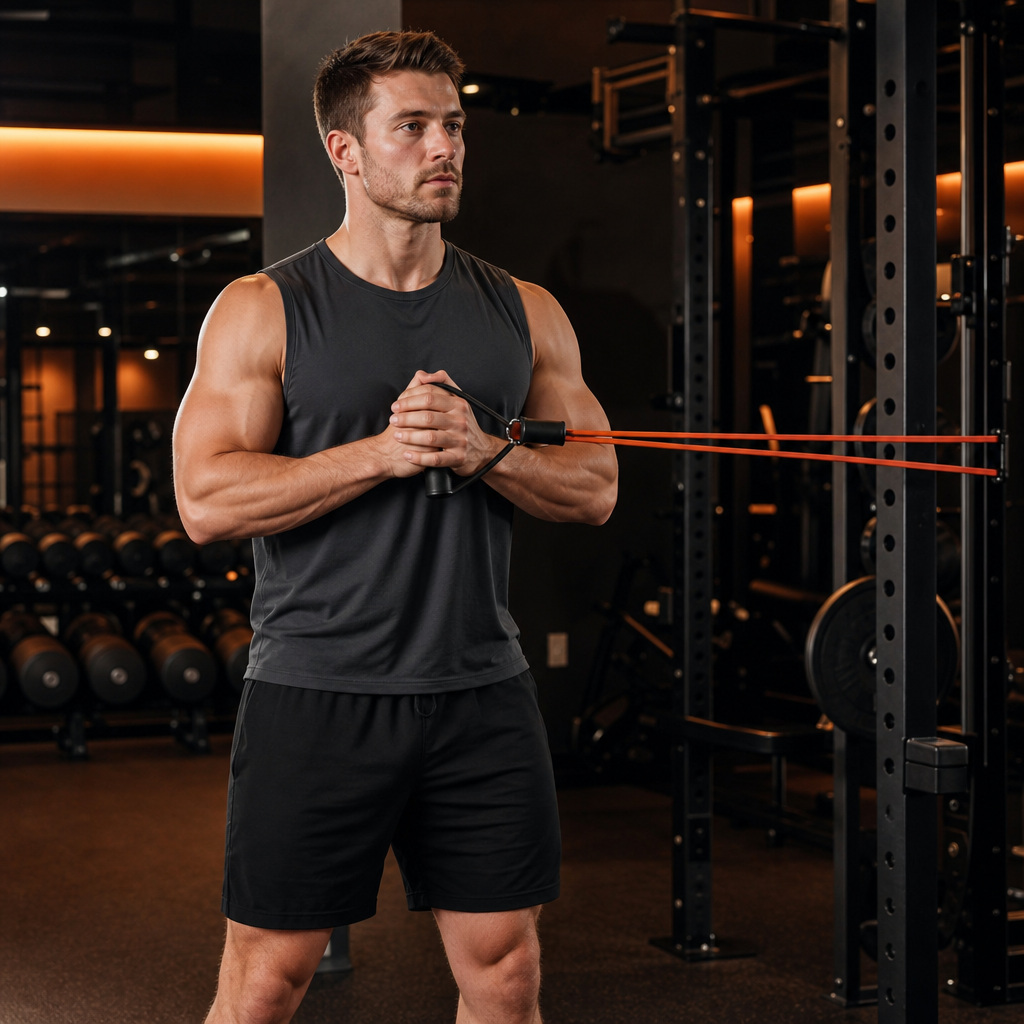
Anchor a resistance band at chest height to a sturdy object on your side — a door handle, squat rack post, or cable machine arm. Stand perpendicular to the anchor point with feet shoulder-width apart, knees slightly bent. Hold the band handle with both hands at the center of your chest. Step away from the anchor until you feel strong tension in the band. The farther you stand, the harder the exercise. Brace your core before you begin — imagine someone is about to push you sideways.
Step 2 — Pressed-Out Position
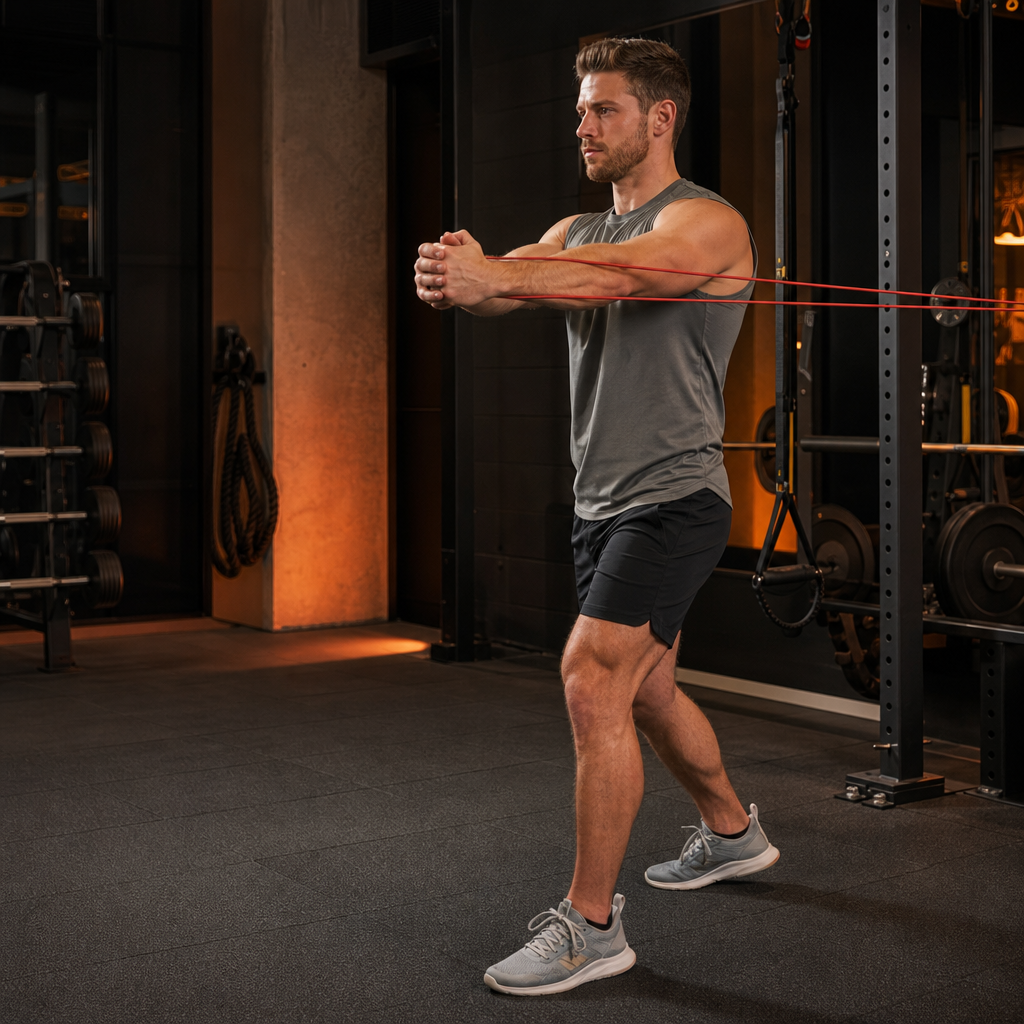
Press both hands straight out in front of your chest, extending your arms fully. This is where the band exerts maximum rotational force — it wants to pull your hands and torso back toward the anchor. Your job is to keep your arms locked out in front of your sternum without letting your torso rotate even one degree. Your hips and shoulders should stay perfectly squared forward.
Step 3 — Hold and Resist Rotation
Hold the pressed-out position for 2–3 seconds. This is the money position — your obliques and deep core stabilizers are firing at maximum to prevent rotation. Do not let your torso twist, your hips shift, or your shoulders turn. If you feel yourself being pulled toward the anchor, you are too close to failure — step slightly closer to the anchor to reduce tension and rebuild your form.
Step 4 — Breathing and Return
Exhale as you press out, maintain steady breathing during the hold, and inhale as you bring your hands back to your chest. Never hold your breath — the Valsalva maneuver raises blood pressure and reduces core endurance. Return your hands to your chest in a controlled motion — do not let the band snap you back. Complete all reps on one side, then turn around and face the opposite direction to train the other side.
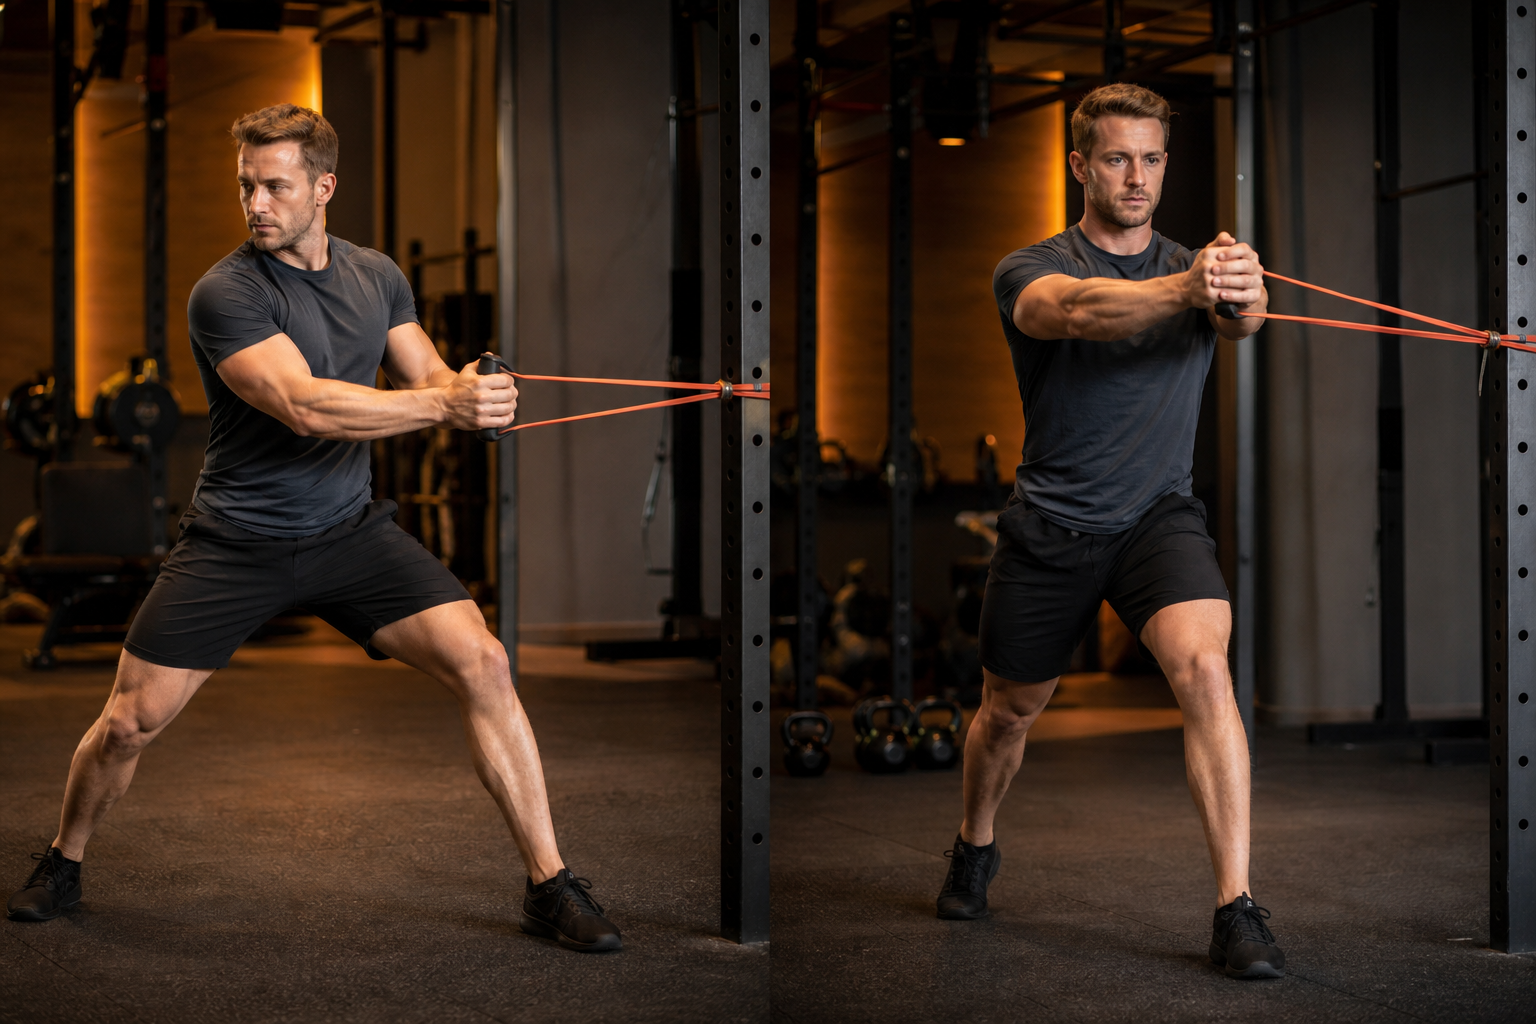
Banded anti-rotation press starting position at chest
Banded anti-rotation press fully pressed out
How to Do the Pallof Press with Proper Form

The Pallof press is named after physical therapist John Pallof and is one of the most widely prescribed exercises in sports medicine and rehabilitation. It uses the same anti-rotation principle as the anti-rotation press, but the pressing motion comes from the center of your chest, adding a diagonal force vector that challenges your core in a slightly different pattern. It targets the transverse abdominis, obliques, multifidus, and deep core stabilizers.
Step 1 — Band Setup and Position
Anchor a resistance band at chest height to a sturdy object on your side — the same setup as the anti-rotation press. Stand perpendicular to the anchor point with feet shoulder-width apart or slightly wider for a more stable base. Hold the band handle with both hands directly in front of the center of your chest, elbows tucked in. Step away from the anchor until you feel firm tension. Brace your core and squeeze your glutes — this locks your pelvis and prevents your hips from compensating.
Step 2 — Press Out from Chest
Press both hands straight out from the center of your chest to full arm extension. The band will try to rotate your torso toward the anchor point — your core must fire to keep your chest and hips facing forward. The key difference from the anti-rotation press is the starting point: you press from the center of your body outward, which creates a longer lever arm and a more challenging diagonal pull at full extension.
Step 3 — Hold and Resist
Hold the fully extended position for 2–3 seconds. At full arm extension, the band exerts its peak rotational force. Your obliques on the side away from the anchor must contract powerfully to prevent your torso from rotating. Keep your arms at sternum height — do not let them drift up or down. Your body from hips to shoulders should remain in a rigid, neutral line.
Step 4 — Breathing and Return
Exhale as you press out, breathe steadily during the hold, and inhale as you return your hands to your chest. Return slowly — the band wants to snap you back, and that uncontrolled recoil is where injuries happen. Complete all reps facing one direction, then turn around to train the opposite side. Always train both sides equally to prevent imbalances.
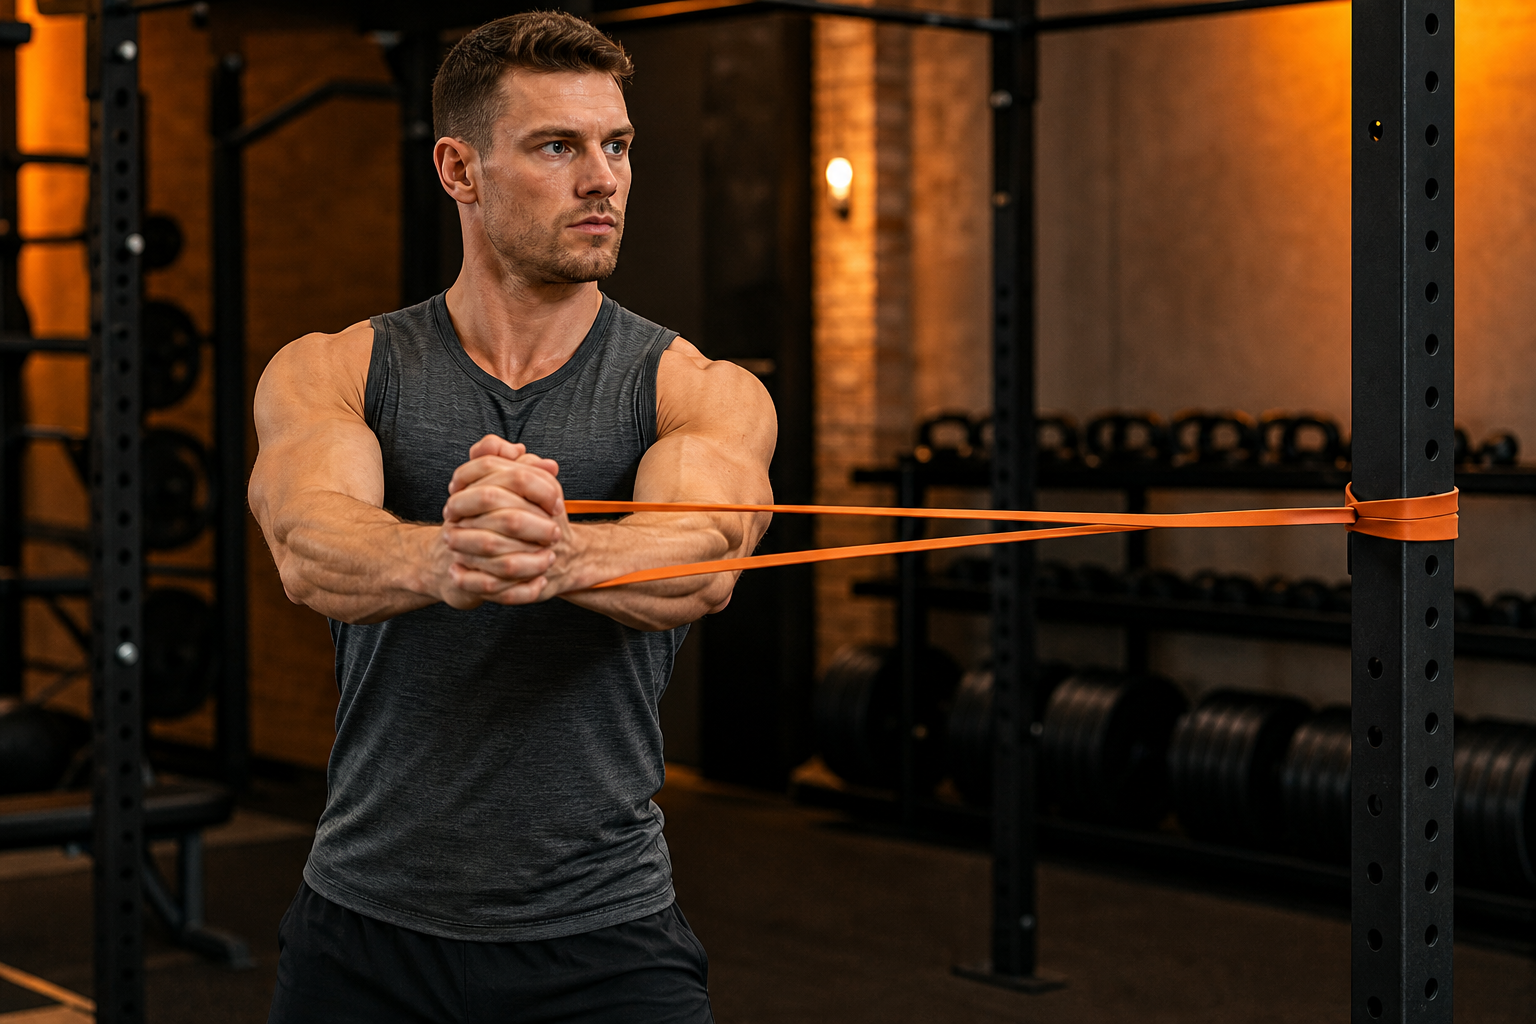
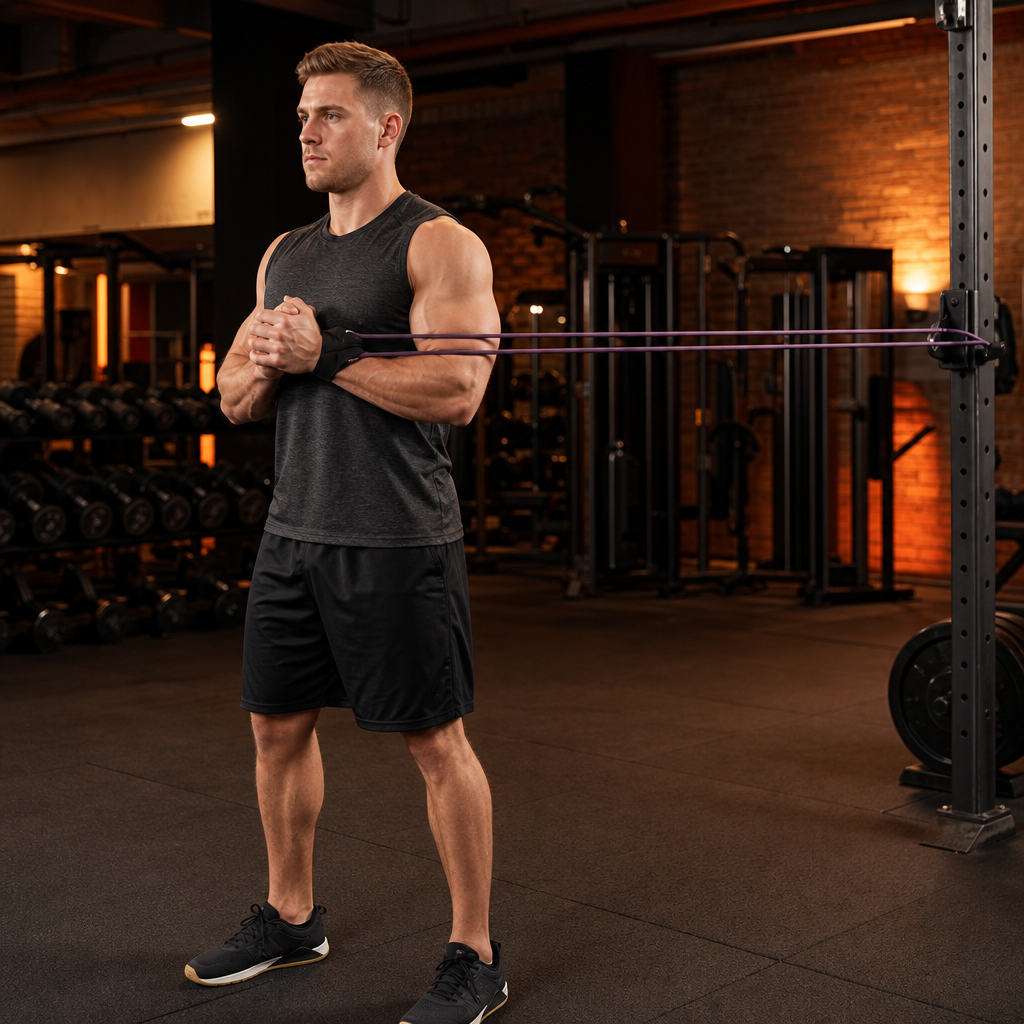
Pallof press starting position at chest
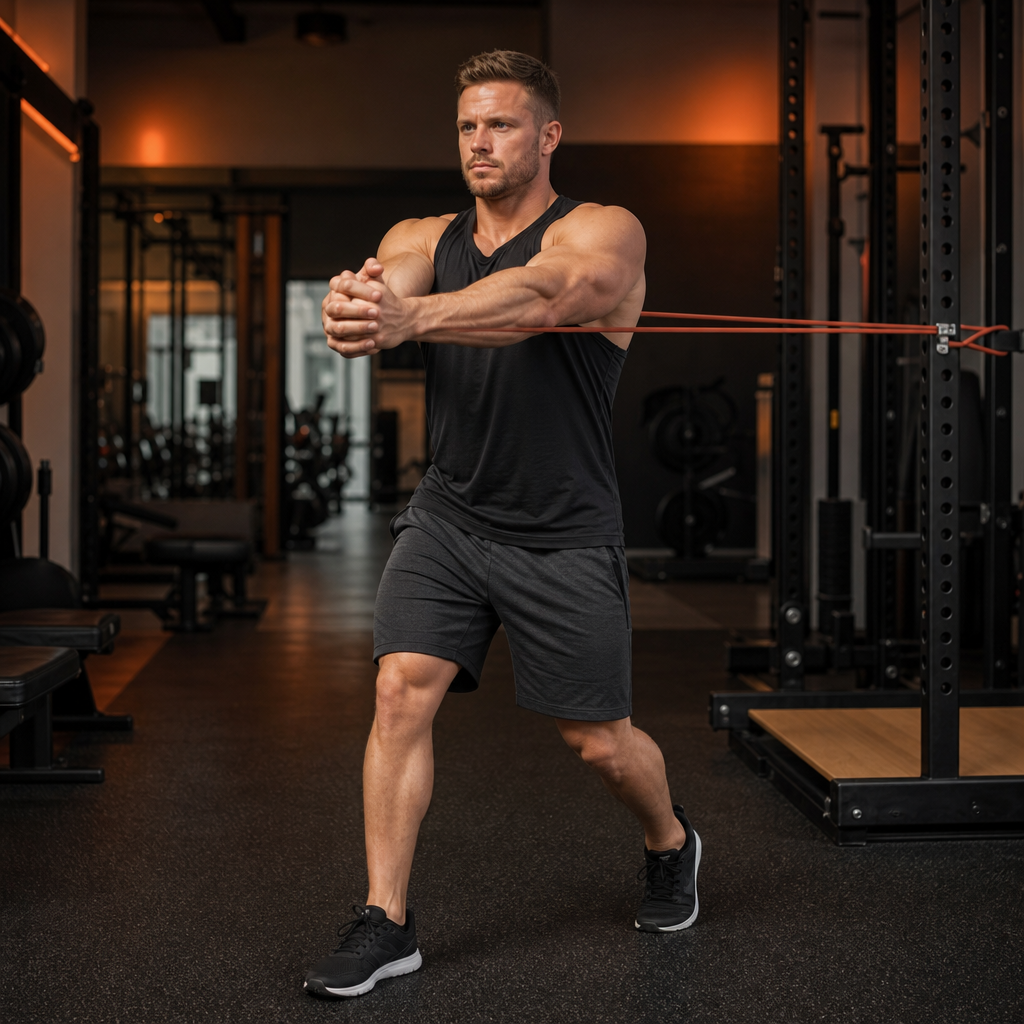
Pallof press fully extended position
What Are the Most Common Core Band Mistakes

These errors undermine the anti-rotation benefit and can lead to compensatory patterns that defeat the purpose of the exercise. Fix them to get real core stability results.
Rotating with the band: The entire point of these exercises is to resist rotation. If your torso twists toward the anchor, you are failing the exercise. Reduce the tension, step closer to the anchor, and rebuild your braced position before progressing.
Not bracing the core: Anti-rotation exercises only work if your core is actively engaged. If your stomach is relaxed and you are relying on your arms and shoulders to hold position, you are missing the training effect. Brace before every rep — imagine preparing for a punch to the gut.
Feet too close together: A narrow stance makes it harder to resist rotation. Start with feet at least shoulder-width apart. A wider stance gives you a more stable base so your core — not your balance — is the limiting factor.
Using too heavy a band: More tension is not better. If you cannot hold the extended position for at least 2 seconds without rotating, the band is too heavy. Anti-rotation training is about control, not resistance. Master a lighter band before moving up.
Rushing the hold: The hold at full extension is where the core work happens. If you press out and immediately return, you are turning an anti-rotation exercise into a speed drill. Hold for 2–3 seconds every single rep. Quality over speed, always.
What Are the Key Takeaways
| Point | Recommendation |
|---|---|
| Why bands for core | Constant anti-rotation tension + accessible anywhere + no momentum cheating |
| Anti-rotation press | Band at side, press straight out, resist band pulling you sideways, hold 2–3 seconds |
| Pallof press | Same setup, press from chest center to full extension, resist rotation, hold 2–3 seconds |
| Both exercises | Brace core before each rep, feet shoulder-width, breathe steadily, train both sides |
| Progression | Master form with light band first, then increase tension or hold time |
Quick mistake checklist:
- Rotating with the band — reduce tension, step closer, rebuild brace
- Core not braced — engage before every rep, prepare for impact
- Feet too close — widen stance to at least shoulder-width
- Band too heavy — if you cannot hold 2 seconds without rotating, go lighter
- Rushing the hold — 2–3 second hold every rep, quality over speed
Recommended core training combination: Banded anti-rotation press 3×10 per side + Pallof press 3×10 per side + Dead bug 3×12 + Plank 3×30–60 seconds. Anti-rotation stability + anti-extension + endurance = complete functional core training.
Frequently Asked Questions
Can I build a strong core with just resistance bands?
Yes, especially for functional core strength. Bands excel at anti-rotation and anti-extension training (Pallof press, banded dead bug), which translates better to real-life stability than endless crunches. Add planks and side planks for a complete routine.
What is the Pallof press and why is it so effective?
The Pallof press is an anti-rotation exercise: you hold a band at your chest and press it straight out, resisting the band pulling you sideways. It trains your core to resist twisting — which is exactly what your core does during squats, deadlifts, and sports.
How tight should the resistance band be for core exercises?
Start with a band that gives moderate resistance at full extension — you should be able to hold each position for 10-15 seconds without your form breaking. Too much tension makes you cheat with your arms and legs instead of your core.