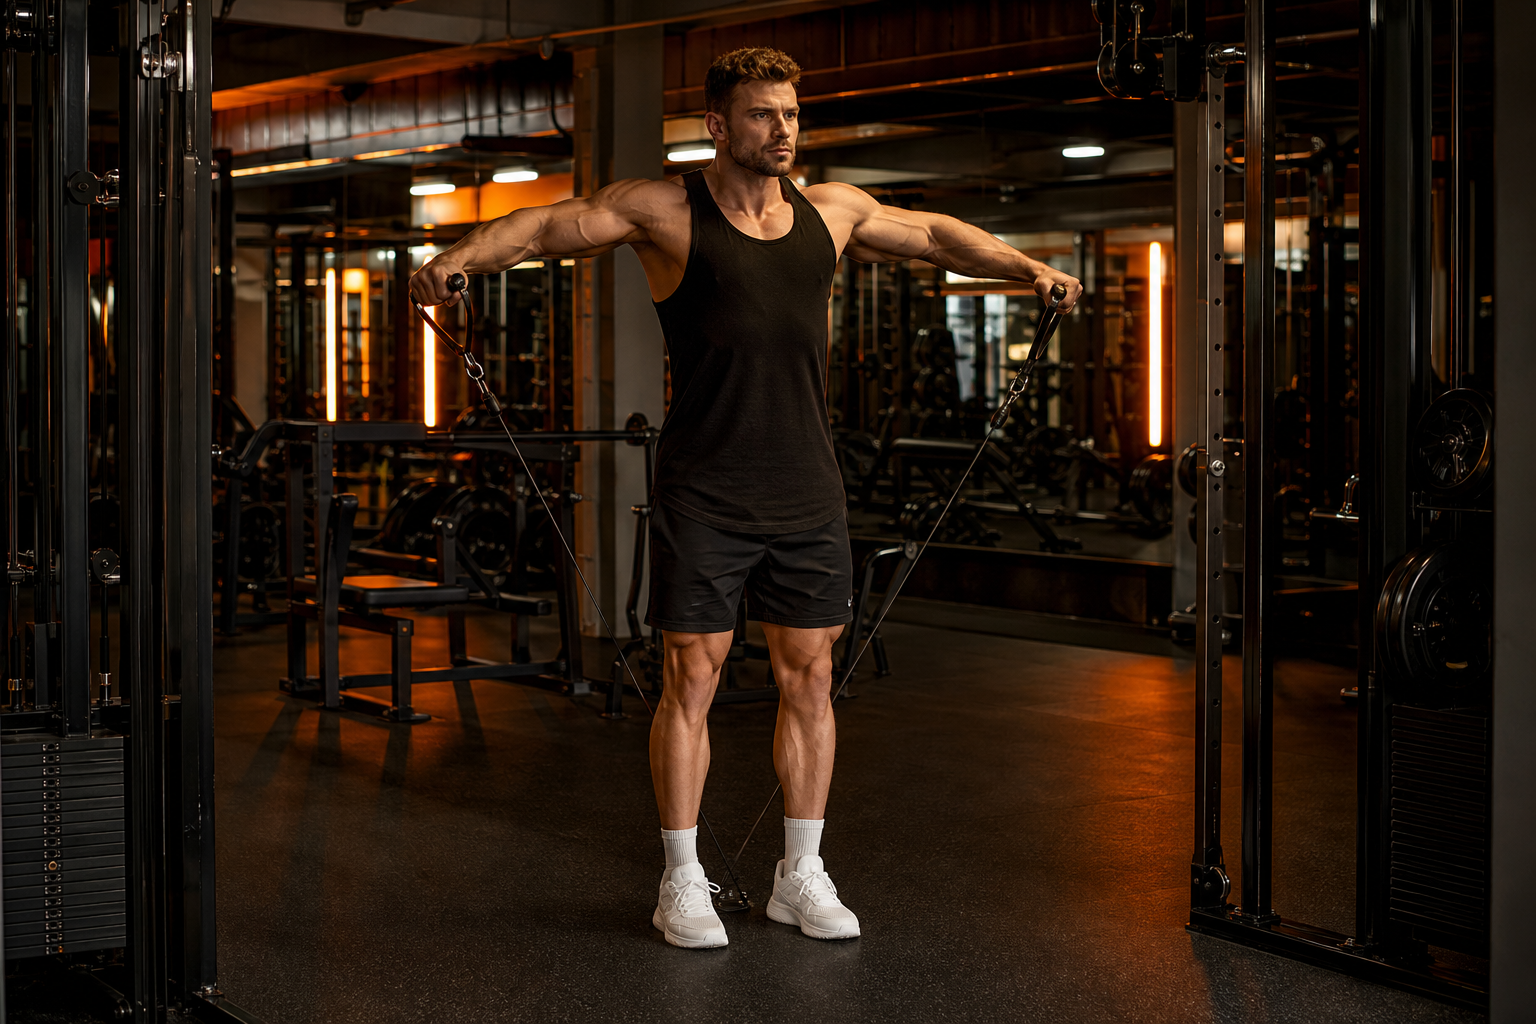
Shoulder Cable Workout: Cable Lateral Raise and Face Pull
Why Cables Are Excellent for Shoulder Sculpting
Cable machines provide something free weights cannot: constant tension throughout the entire range of motion. When you perform a dumbbell lateral raise, the resistance drops to nearly zero at the bottom of the movement — gravity only pulls vertically, so the lever arm is shortest where the weight hangs. With a cable, the resistance profile follows the muscle's strength curve, keeping the lateral and rear deltoids under load from start to finish.
This constant tension makes cables superior for high-rep shoulder sculpting work. A 2022 review in the Journal of Functional Morphology and Kinesiology highlighted that constant-tension modalities like cables produced greater time under tension (TUT) for deltoid musculature compared to free-weight equivalents, a key driver of hypertrophy. Cables also allow smoother, more joint-friendly loading patterns — especially important for the relatively small and injury-prone shoulder joint complex.
This guide covers the two most effective cable shoulder exercises: the cable lateral raise for side delts and the face pull for rear delts and rotator cuff health.
How to Do the Cable Lateral Raise with Proper Form
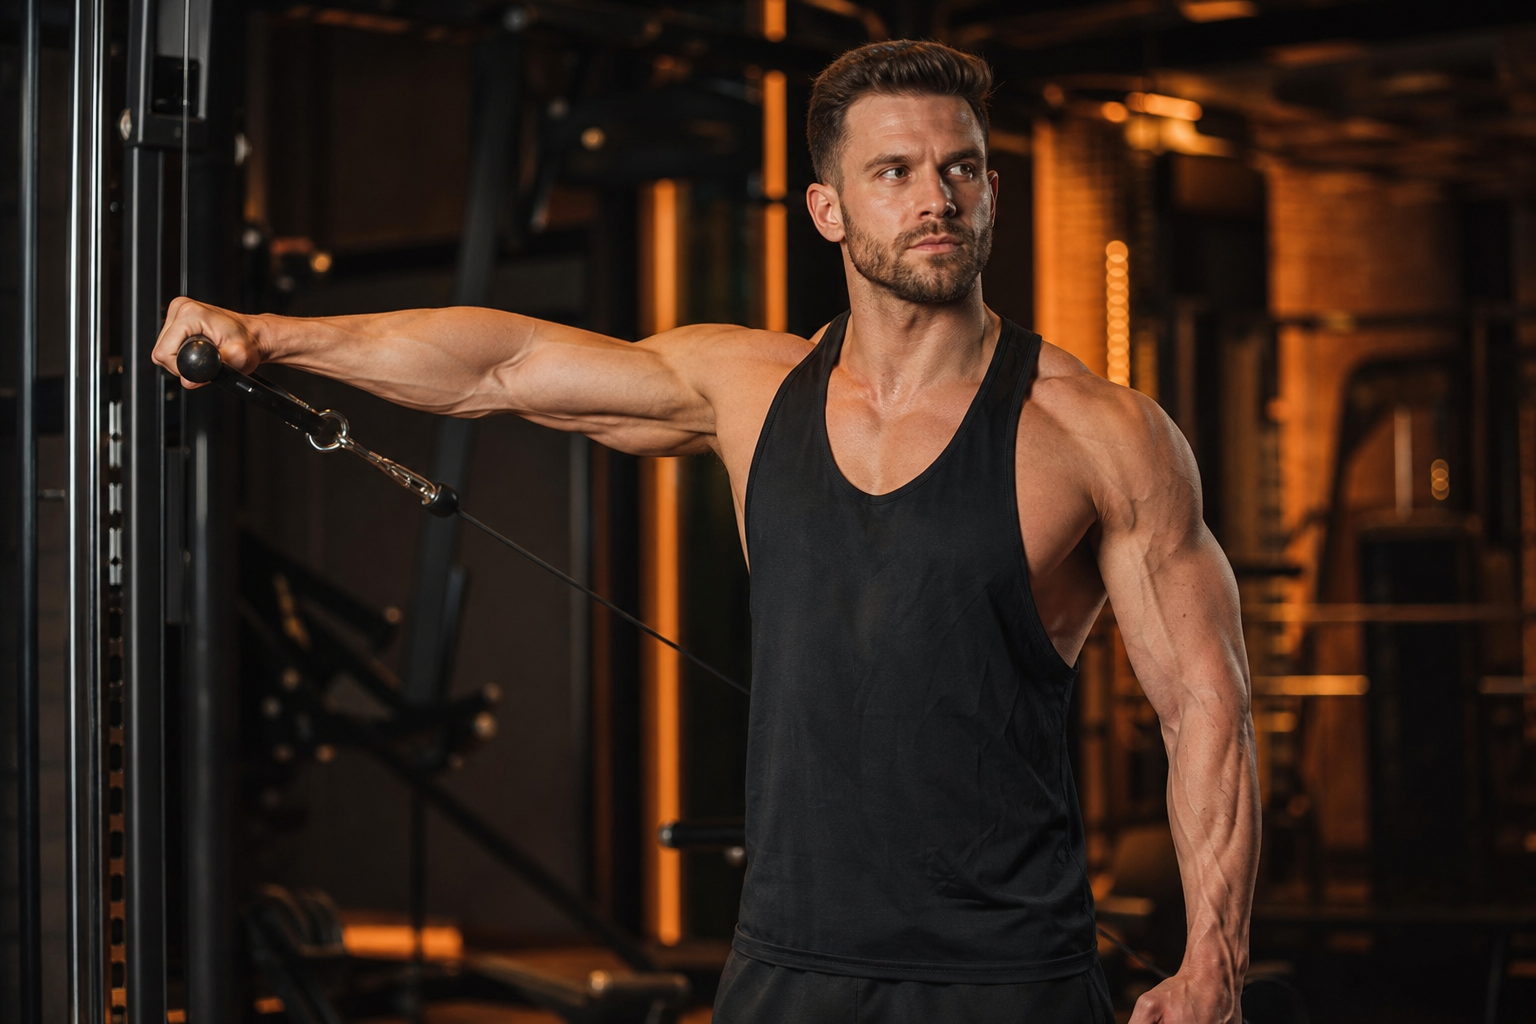
The cable lateral raise targets the lateral head of the deltoid with constant tension, making it more effective than the dumbbell version for building shoulder width and definition.
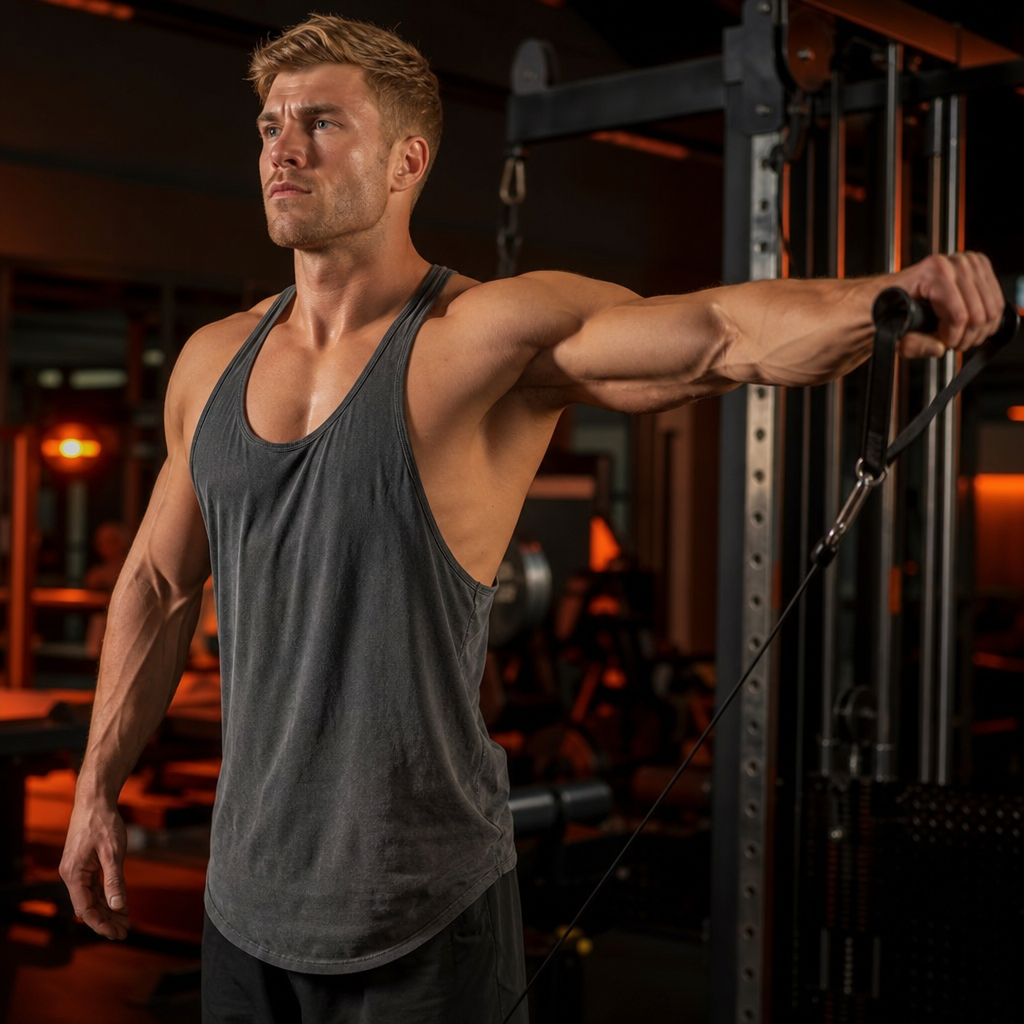
Step 1 — Setup and Cable Position
Set the cable pulley to the lowest position. Stand sideways to the machine so the cable crosses in front of your body. Grab the handle with the hand farthest from the machine — this ensures the cable pulls across your body, maximizing the lateral deltoid's leverage. Stand with your feet shoulder-width apart, knees slightly bent, and lean slightly forward from the hips (about 10–15°). This forward lean pre-stretches the lateral delt and reduces upper trap involvement.
Step 2 — Starting Position
Let your working arm hang across your body in front of your opposite hip, holding the handle with a neutral or slightly pronated grip. Your non-working hand can rest on the machine or your hip for balance. Keep your shoulder down and away from your ear — actively depress your scapula. This is your starting position, where the cable already provides tension unlike a dumbbell at rest.
Step 3 — Raise to Shoulder Height
In a smooth, controlled motion, raise your arm out to the side until it reaches shoulder height (upper arm parallel to the floor). Lead with your elbow, not your hand — imagine your elbow is pulling the weight. Keep a slight bend in your elbow (about 10–20°) and maintain that angle throughout. Do not raise above shoulder height — this shifts the work to the upper traps. At the top, hold for a brief beat and squeeze your lateral deltoid. The cable's constant tension means you feel resistance even at the top, unlike a dumbbell.
Step 4 — Breathing and Control
Inhale as you lower the handle back to the starting position across your body. Exhale as you raise it to shoulder height. Control the eccentric — do not let the weight stack crash down. The lowering phase should take 2–3 seconds. Perform all reps on one side before switching. Aim for 12–20 reps per side to capitalize on the constant-tension advantage of cables.

Cable lateral raise bottom starting position
Cable lateral raise top position at shoulder height
How to Do the Face Pull with Proper Form
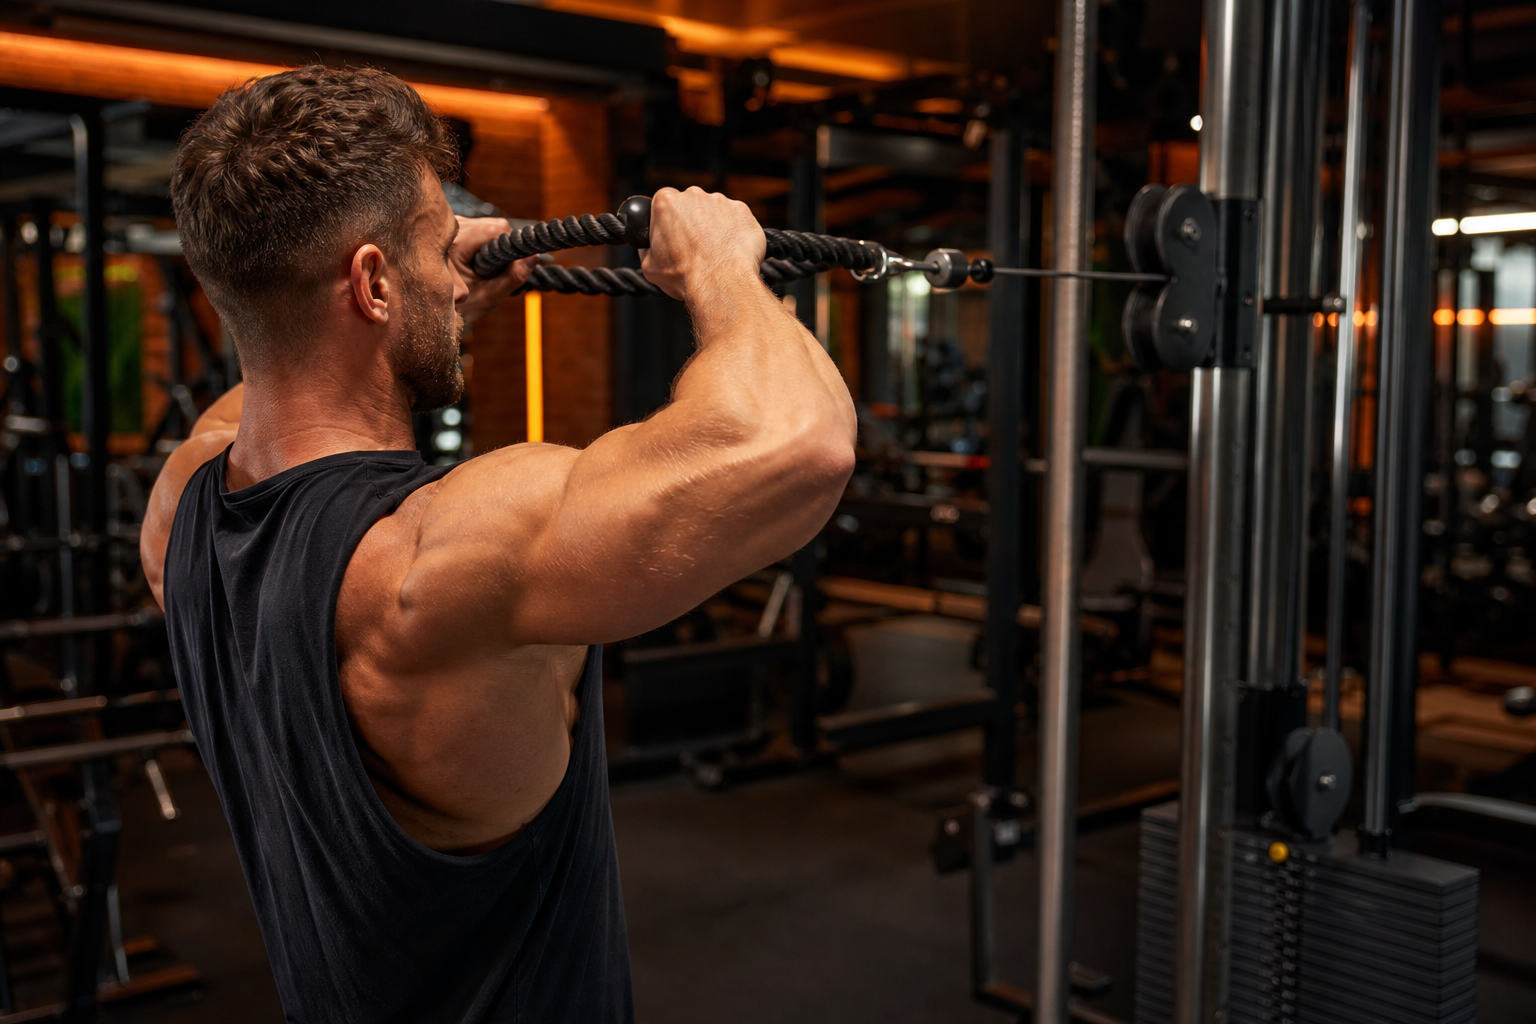
The face pull is the single most important exercise for rear deltoid development and rotator cuff health. It trains external rotation, scapular retraction, and posterior deltoid activation simultaneously — a combination essential for shoulder longevity and posture correction.
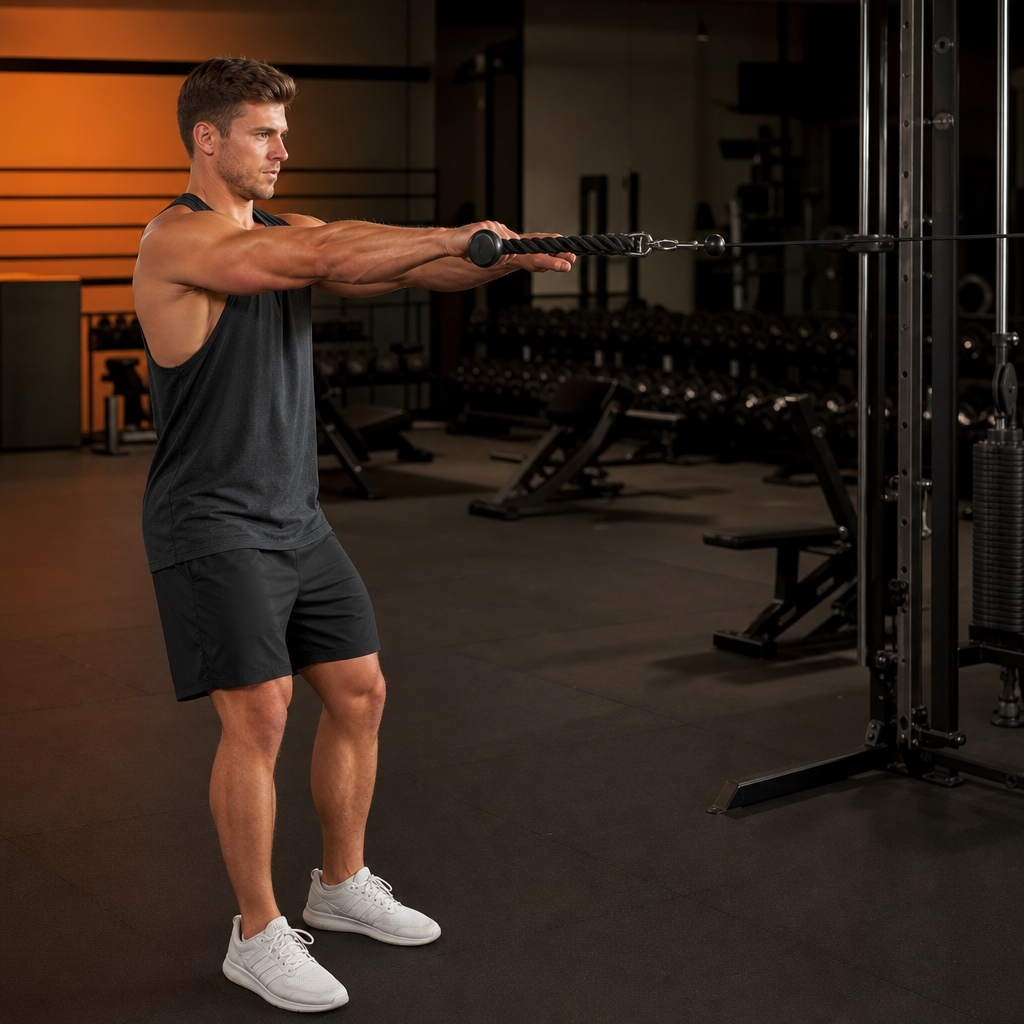
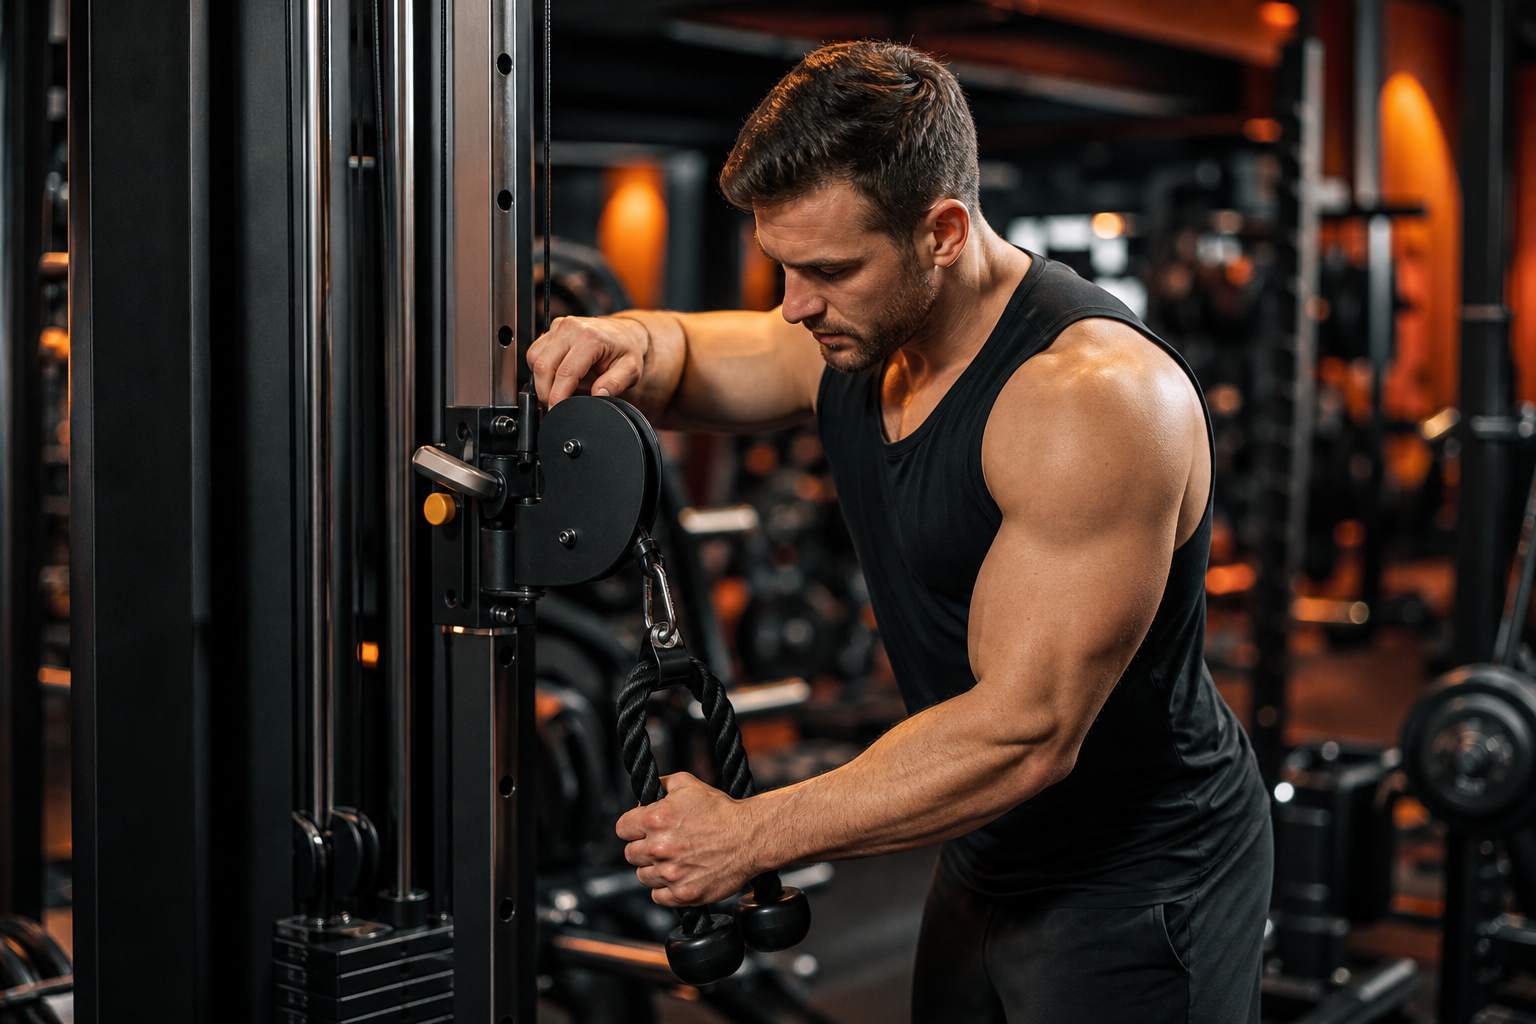
Step 1 — Setup and Rope Attachment
Set the cable pulley to approximately face height (around eye level). Attach a rope handle to the carabiner. Grab the rope with both hands using a neutral grip (palms facing each other), and step back far enough that the weight stack lifts slightly — you want tension from the very first inch of movement. Stand with feet shoulder-width apart, a slight bend in your knees, and your core braced. Your arms should be fully extended toward the pulley.
Step 2 — Arms Extended Position
From the fully extended starting position, your arms are straight out in front of you at face height, holding the rope ends. Your shoulders may be slightly pulled forward — that is fine, as you will actively retract them during the pull. Keep your torso upright; do not lean back to generate momentum. This is the start of every rep.
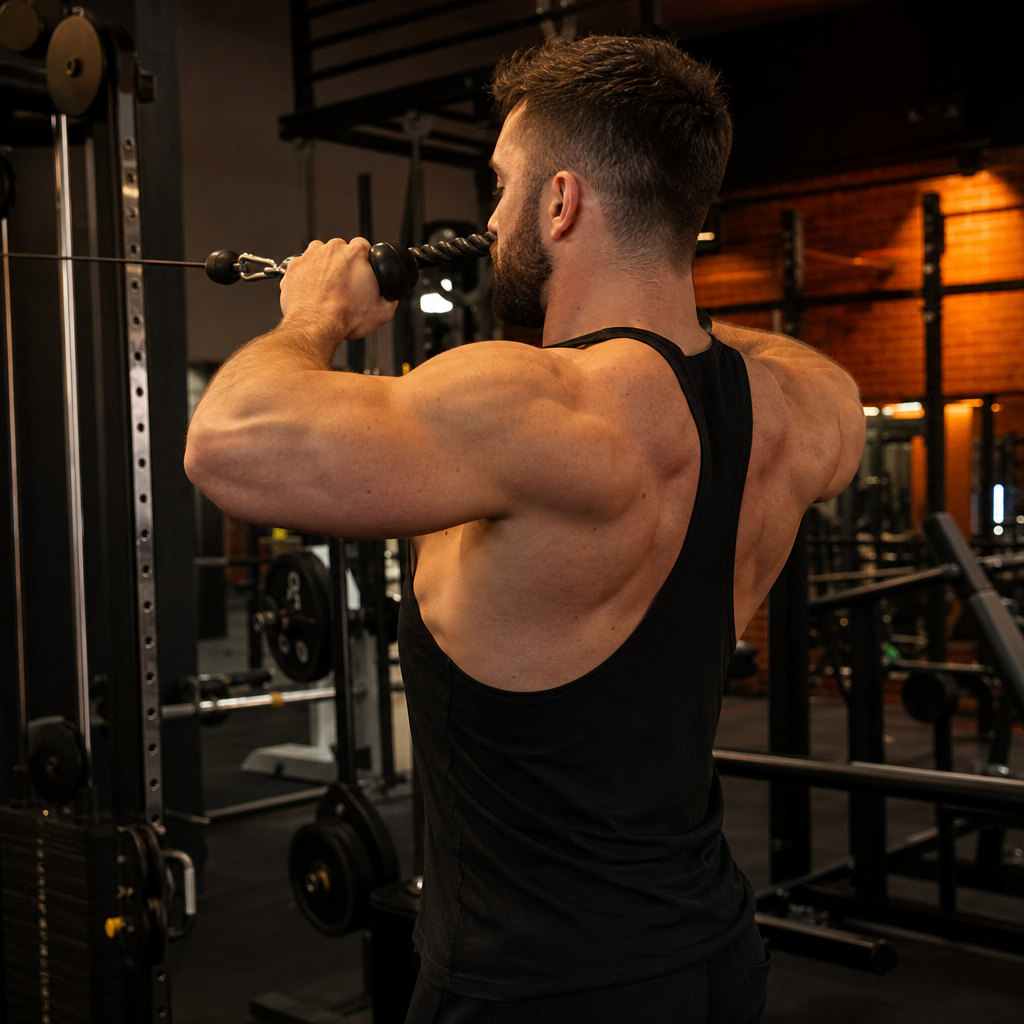
Step 3 — Pull to Face and External Rotation
Pull the rope toward your face, separating your hands as the rope approaches. The movement has two components: first, pull your hands back by squeezing your shoulder blades together (scapular retraction); second, as your hands pass your ears, externally rotate your shoulders so your hands move upward and outward — the rope should end up alongside your head with your hands at ear height and your elbows high and wide. At the end position, your upper arms should be nearly horizontal and your forearms vertical, forming an L-shape. Squeeze your rear deltoids hard for a full second. The external rotation at the end is critical — it is what distinguishes a proper face pull from a simple row to the face.
Step 4 — Breathing and Return
Inhale as you extend your arms back to the starting position. Exhale as you pull the rope to your face. Control the return — do not let the weight snap back. The eccentric should take 2–3 seconds. Use a moderate weight that allows you to hold the squeeze at the end. Face pulls are not a heavy lift — they are a control and health exercise. Aim for 15–20 reps with perfect form.
Face pull starting position with arms extended
Face pull end position with external rotation
What Are the Most Common Cable Shoulder Mistakes
These errors reduce effectiveness and increase injury risk. Fix them to get the most out of your cable shoulder training.
Using momentum on lateral raises: Swinging your torso to heave the weight up shifts the load from your lateral delt to your whole body. If you need momentum, the weight is too heavy. Lighten the load and control every rep — cables are about tension, not ego.
Raising above shoulder height on lateral raises: Once your upper arm goes above parallel to the floor, the upper trapezius takes over. The lateral deltoid's leverage drops sharply above 90° of abduction. Stop at shoulder height and squeeze.
Face pull with too much weight: The face pull is a corrective and hypertrophy exercise for small muscles (rear delts, rotator cuff). Heavy loads cause compensation patterns — leaning back, using the lats, or turning it into a row. Use a weight you can hold and squeeze for a full second at the end position.
Internal rotation on face pull: If your hands stay below your ears or your elbows point downward at the end, you are internally rotating — this defeats the purpose. The face pull must finish with external rotation: hands up, elbows out, rope alongside your head. This trains the infraspinatus and teres minor, which is the whole point.
Shrugging your traps: On both exercises, letting your shoulders creep up toward your ears turns a deltoid exercise into a trap exercise. Actively depress your scapulae before every rep. Think "shoulders down and back" as your setup cue.
What Are the Key Takeaways
| Point | Recommendation |
|---|---|
| Why cables for shoulders | Constant tension + better TUT + joint-friendly loading |
| Cable lateral raise setup | Low pulley, cross-body, slight forward lean |
| Cable lateral raise height | Shoulder height only — do not raise above parallel |
| Face pull attachment | Rope at face height, neutral grip |
| Face pull end position | External rotation, hands at ears, elbows high and wide |
| Both exercises | Control eccentric, squeeze at peak, depress scapulae |
Quick mistake checklist:
- Swinging on lateral raises — lighten the load and control every rep
- Raising above shoulder height — stop at parallel, upper traps take over above 90°
- Face pull too heavy — use a weight you can hold and squeeze for a full second
- No external rotation on face pull — finish with hands up, elbows out
- Shrugging traps — actively depress shoulders before every rep
Recommended shoulder day combination: Overhead press 4×8 + Cable lateral raise 3×15 + Face pull 3×20 + Dumbbell reverse fly 3×12. Pressing power + constant-tension sculpting + rear delt health = complete shoulder development.
Frequently Asked Questions
Are cable lateral raises better than dumbbell lateral raises?
Cable lateral raises provide constant tension throughout the entire range of motion, unlike dumbbells where resistance drops to near zero at the bottom. This makes cables superior for high-rep sculpting work and time under tension, though both are valuable in a complete program.
What are the benefits of face pulls?
Face pulls strengthen the rear deltoids, rotator cuff (infraspinatus and teres minor), and improve scapular retraction — all critical for shoulder health and posture. The external rotation at the end is what makes them uniquely valuable for preventing impingement.
How do I set up the cable lateral raise correctly?
Set the pulley to the lowest position, stand sideways so the cable crosses in front of your body, and grab the handle with the hand farthest from the machine. Lean slightly forward from the hips to pre-stretch the lateral deltoid and reduce upper trap involvement.
How do I train rear delts effectively with cables?
Face pulls are your best option — use a rope attachment at face height, pull toward your face while separating your hands, and finish with external rotation so your hands end up at ear height with elbows high and wide. Squeeze the rear delts for a full second.